Chinese-inspired Jambalaya

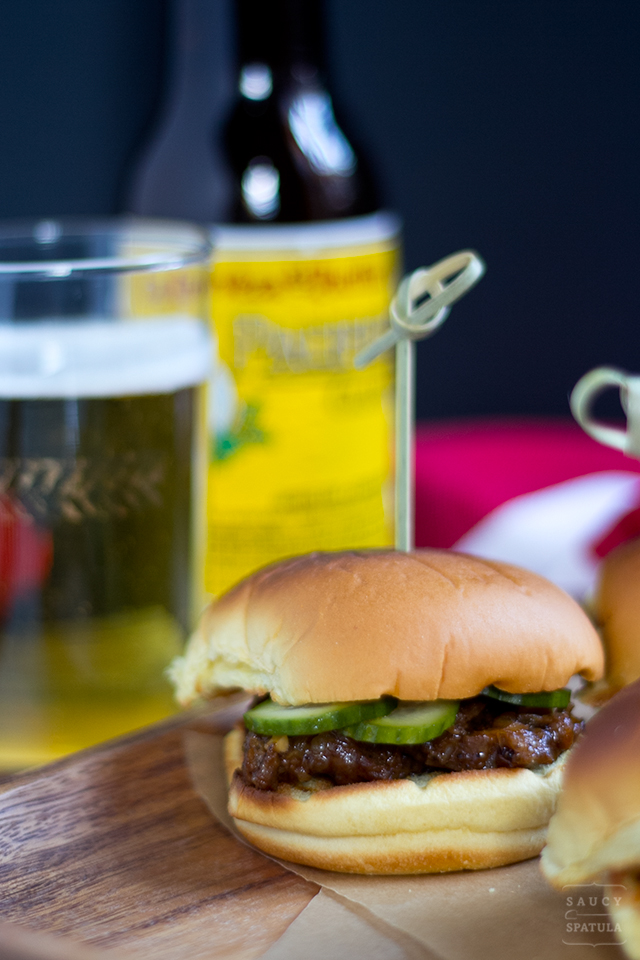
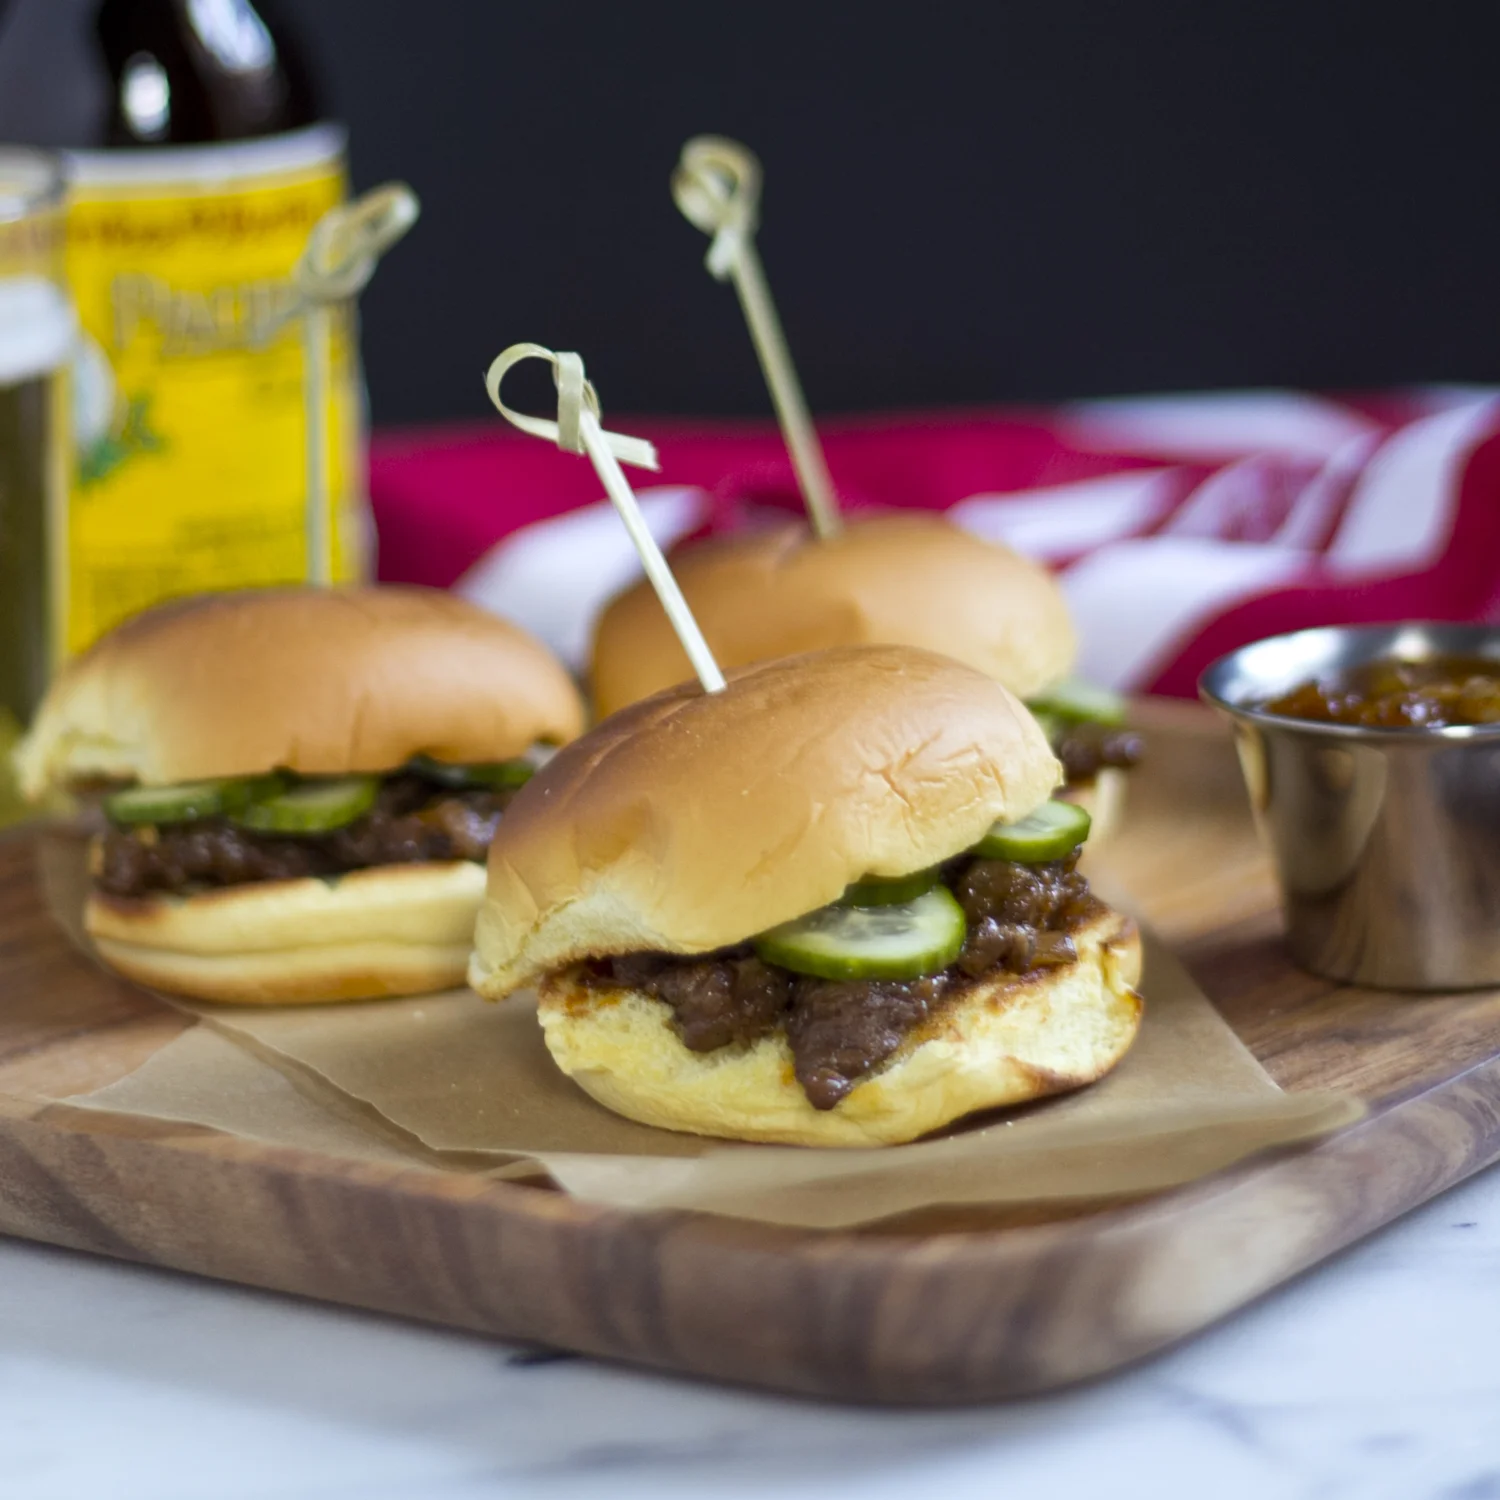
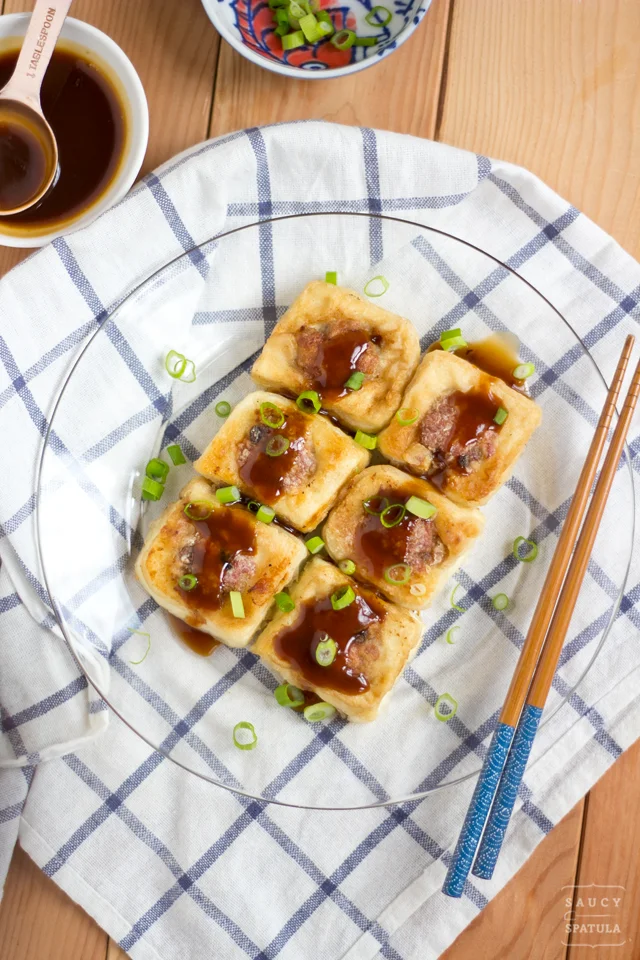
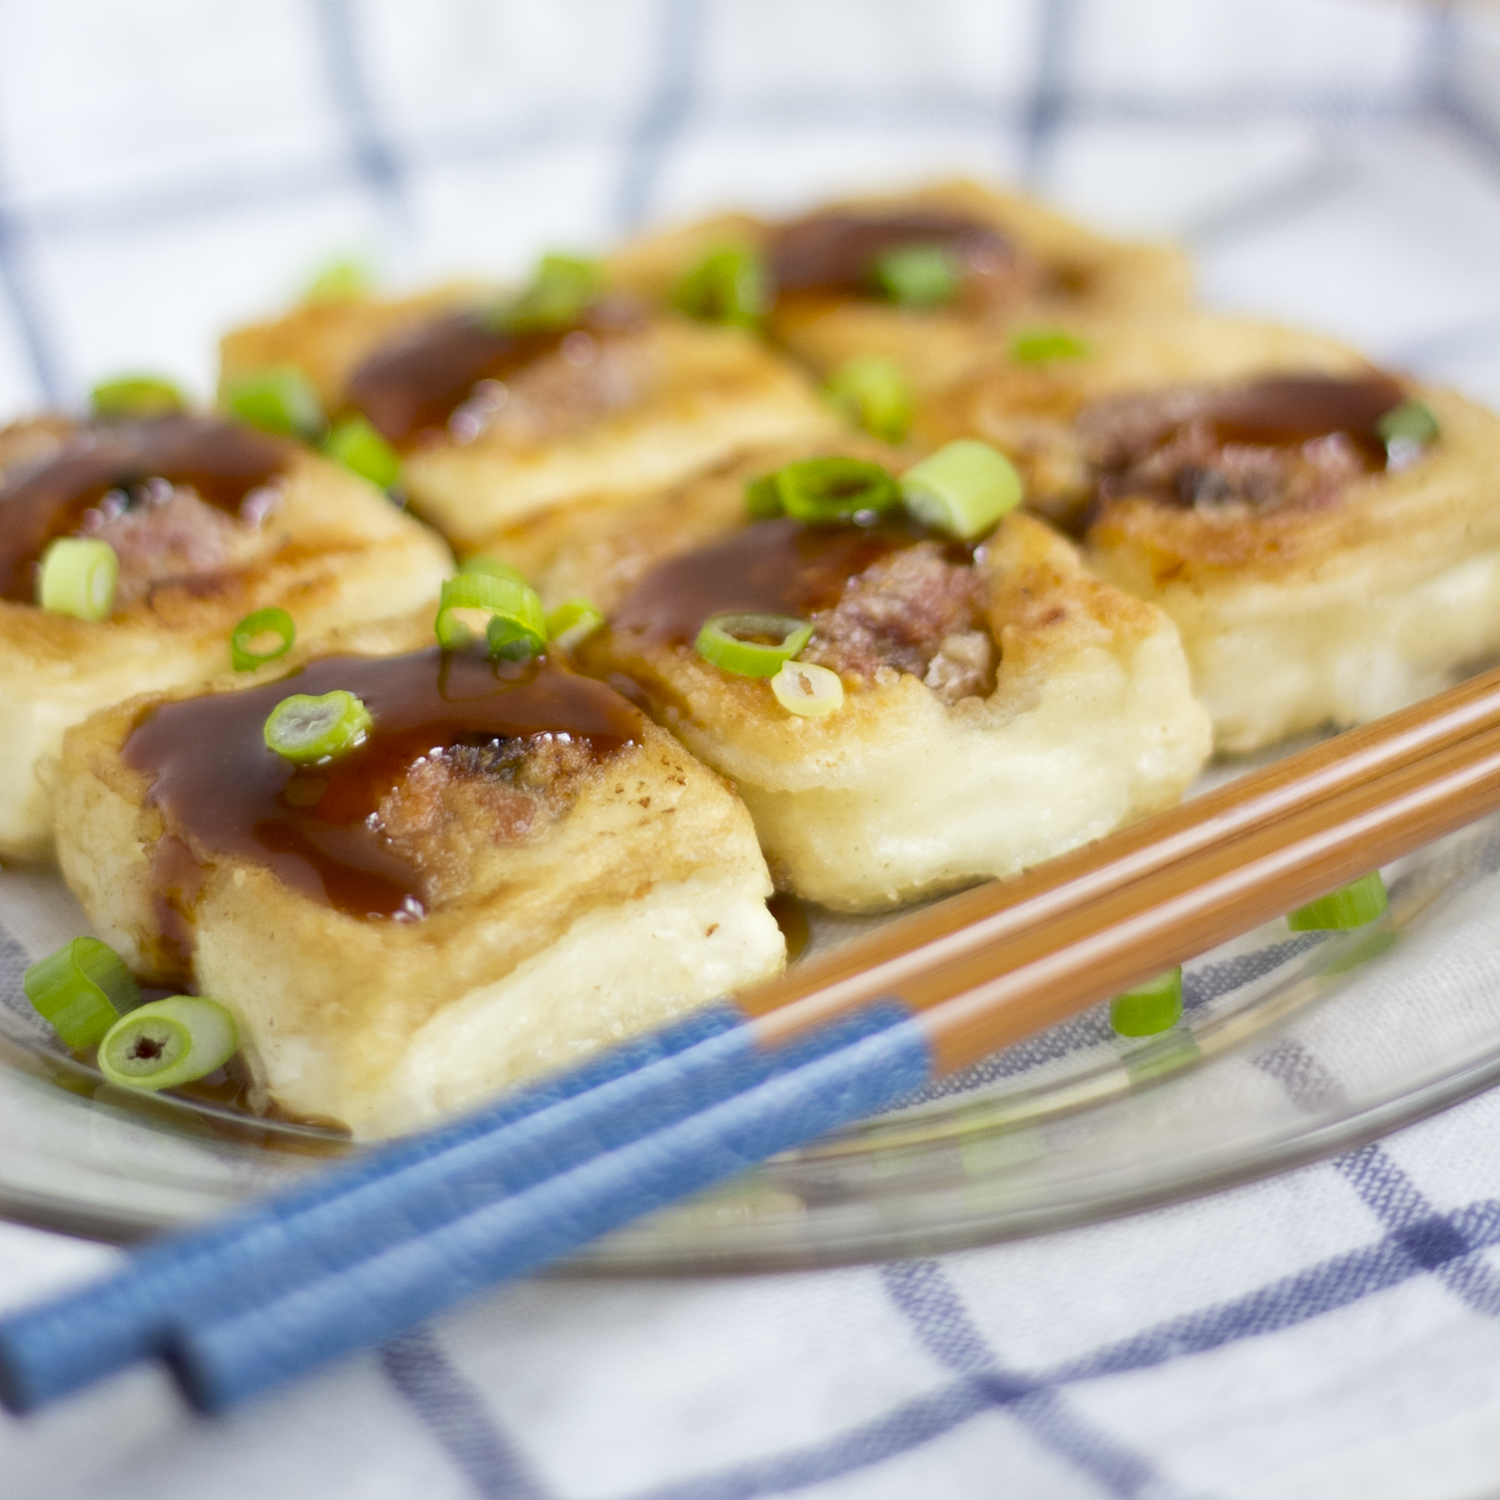
A few months ago, I joined a Facebook group called Food Bloggers Central founded by the amazing Nagi of RecipeTin Eats and Megan of Culinary Hill. I was blown away by how supportive the bloggers are to one another. Food blogging is often a one-man team and having someone (or a group of like-minded people) who will have your back, when you're trying to figure out how to do the million things that's usually required to maintain a food blog, just helps a ton.

I had already befriended Nagi a while back before joining the group (I interviewed her just last year for my blog series Meet My Inspiration) So when she approached me about being a member of Food Bloggers Central, I immediately said yes.

Fast forward to last month, Nagi had initiated this project called Food Blog Hop. The idea is that each blogger who's interested in the project would be matched with two other bloggers, and we would basically cook each other's recipe.

Then maybe a week later, Nagi being her awesome ambitious self posted a spreedsheet of the big list of bloggers, and who each blogger was matched with. What a task! Bravo, Nagi! I quickly went down the list, and found my name next to Neli of Delicious Meets Healthy. I didn't know Neli before so I starting poking around her blog and spotted something I've been wanting to try - Jambalaya.

If you've been following my posts, you probably have noticed my growing love for Southern cuisine ever since I watched the first episode of A Chef's Life. I mean, I did go after Vivian's chicken and rice, and cooked it back to back for two weekends. Would I take a trip down to North Carolina and eat at Vivian Howard's restaurant, Chef & the Farmer? HECK YEAH, in a heartbeat I would. Did you know that A Chef's Life was just nominated for multiple James Beard Awards? I just love what Vivian is doing and the awesome stories that she's been sharing. It's so inspirational to me. My desire to learn about food and culture has been growing faster than I can keep up, and then when I saw Neli's jambalaya, my light bulb bursted into a shower of meat, vegetables, and rice (insert imagination).

Jambalaya reminds me a lot of Hong Kong style clay pot rice. Clay pot rice is such an iconic Hong Kong winter dish. When I was in the Kong 2 weeks ago, I was thrilled when Emily (who I met on Instagram and spent the day hiking the Dragon's Back with) suggested that we'd get clay pot rice for dinner in Yau Ma Tei.

And it was amazing.

Hong Kong style clay pot rice

I love the similarities between Jambalaya and clay pot rice. Both have meat and vegetables cooked in one pot, and it's so rich and savory, it will just shoot you to the moon and back.

So without having much knowledge about this iconic Southern dish, I went off to find out all kinds of things about the Jambalaya.

Jambalaya is a Louisianan dish that has a lot of French and Spanish influences, and it's made differently depending on the region you're in. Many debate over rather the jambalaya was evolved from the Spanish paella or French Jamalaia, or perhaps both given the region's cultural history with Spanish and French settlers in the 18th Century.

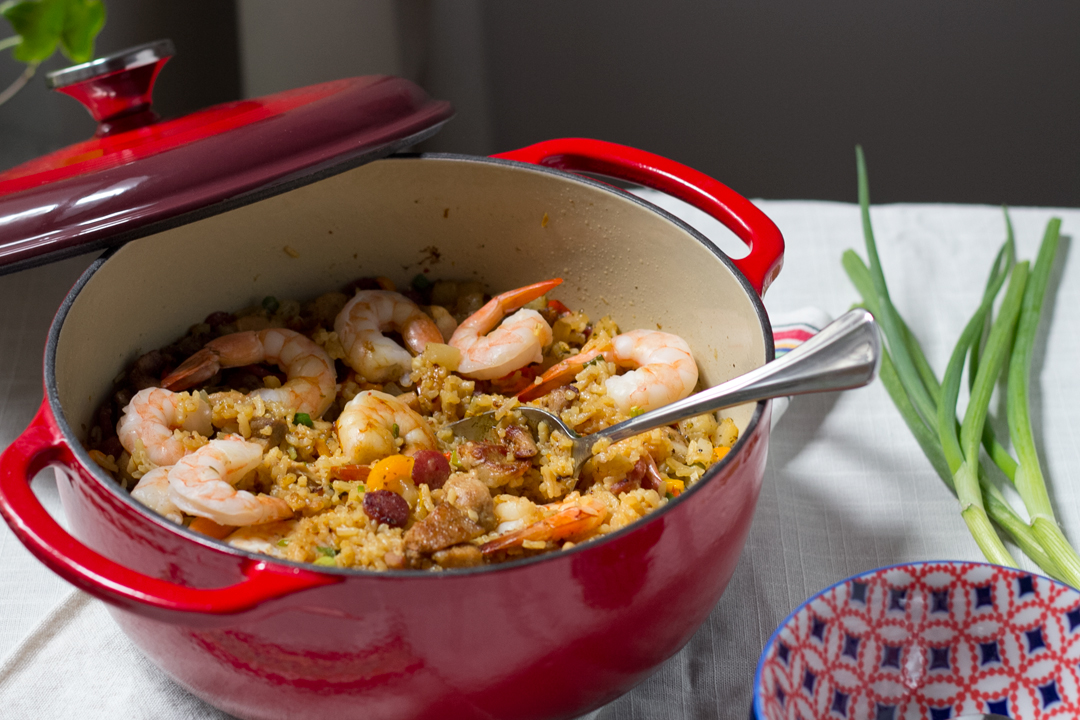
Jambalaya is a lovely and rich stew that has four main ingredients: meats, vegetables, stock, and rice. The most common version is probably the red jambalaya, also known as the Creole jambalaya which is referred to as "city food". Creole jambalaya is more popular near New Orleans, on the Eastern part of Louisiana. The other kind of jambalaya is the brown jambalaya, also known as Cajun jambalaya which is referred to as "country food". And Cajun jambalaya is commonly found in Western and Central Louisiana.

So how the heck do you tell between a Creole and a Cajun jambalaya? The main difference is the use of tomatoes in the Creole jambalaya. And Cajun jambalaya is known as brown jambalaya because of the natural camelization of sugar in meats and veggies in the browning process, and it later gets incorporated into the stock.

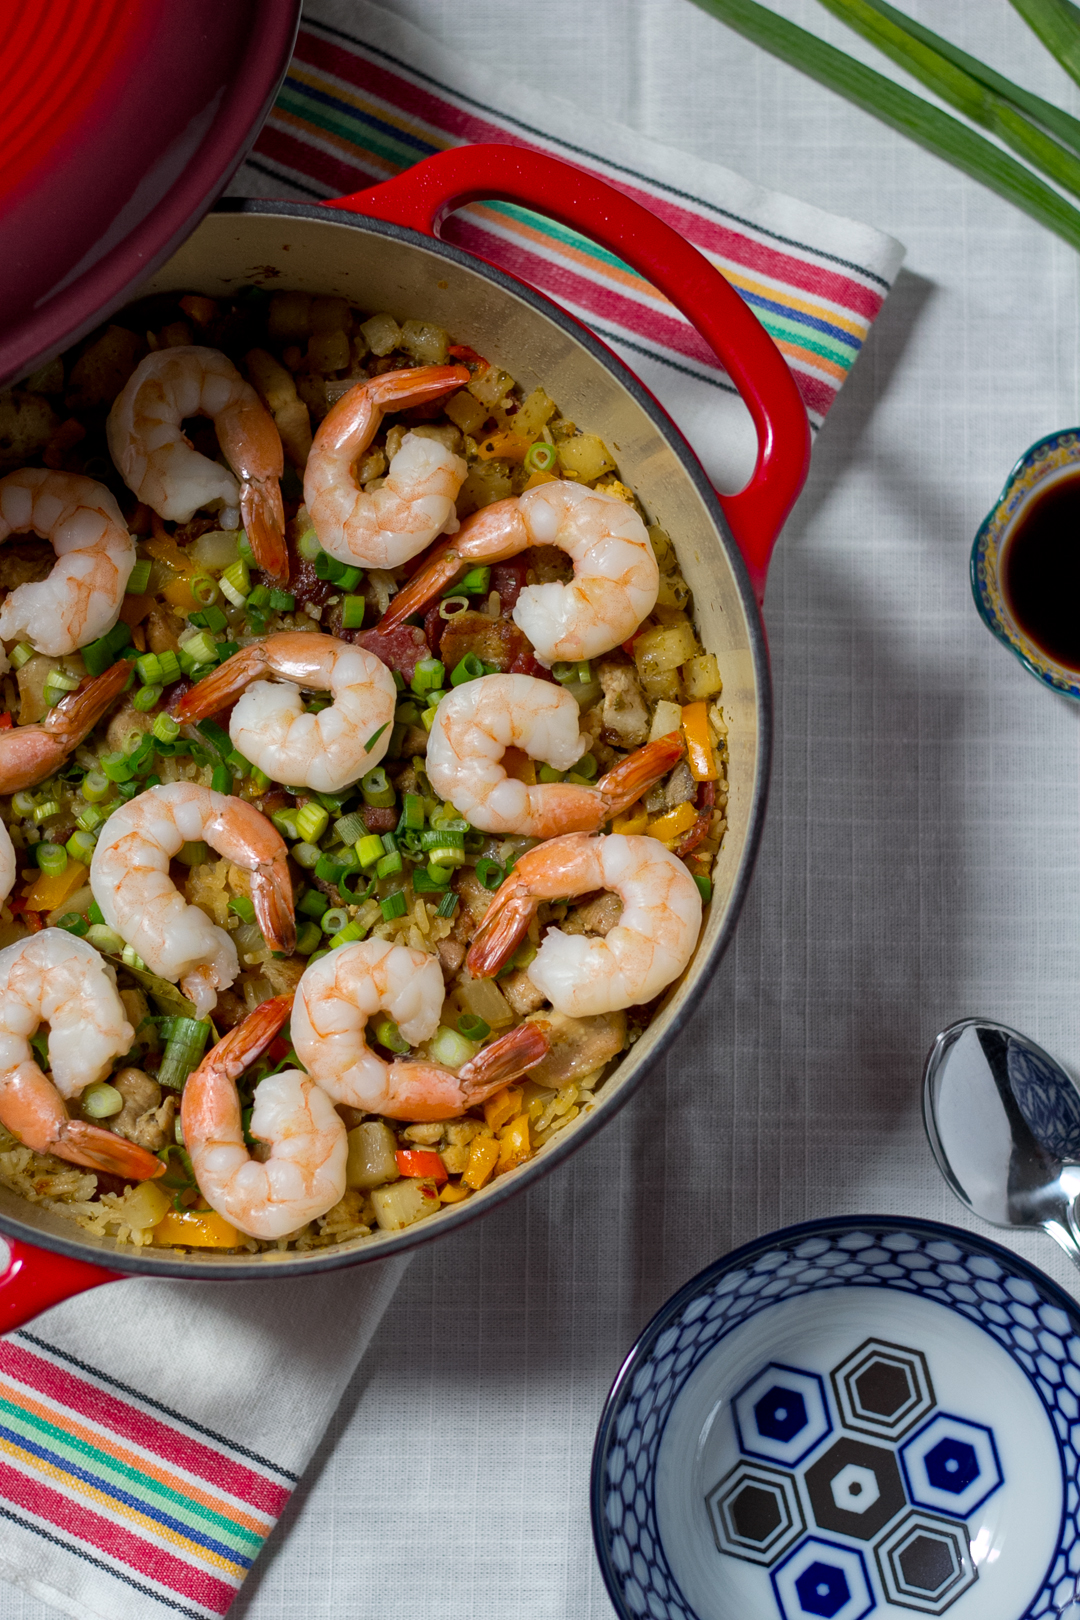
After giving both styles some thoughts, I chose to do a Cajun jambalaya over the Creole jambalaya. The Cajun culture and their history reminds me a lot of my Hakka roots. Cajun food is rustic country food that is generally very well seasoned which shares a lot of common ground with Hakka cuisine. Based on the typical Cajun jambalaya recipes, I switched out some things like onion and smoked sausage with Chinese turnip (lor bak) and Chinese sausage (lap Cheong). I also added five-spiced pork belly, fresh ginger, hoisin sauce, garlic chili sauce, and scallion to kick this Chinese-inspired jambalaya into high gear.

I was ecstatic with this Chinese-inspired Jambalaya that's totally comforting with a touch of my Chinese heritage.

Chinese-inspired Jambalaya

Prep time: 35 mins  Cook time: 35 mins  Total time: 1 hour 10 mins Serves: 5-6

Ingredients

  • 1/2 lb skinless and boneless chicken thighs
  • 1 tsp soy sauce
  • 1/8 tsp white pepper powder
  • 1/2 lb pork belly, skinless
  • 1/4 tsp five spice powder
  • 2oz Chinese sausage (lap cheong)
  • 1 tbsp minced garlic
  • 1 tsp minced ginger
  • 1 cup diced Chinese turnip (lor bak), about 1/2" dices
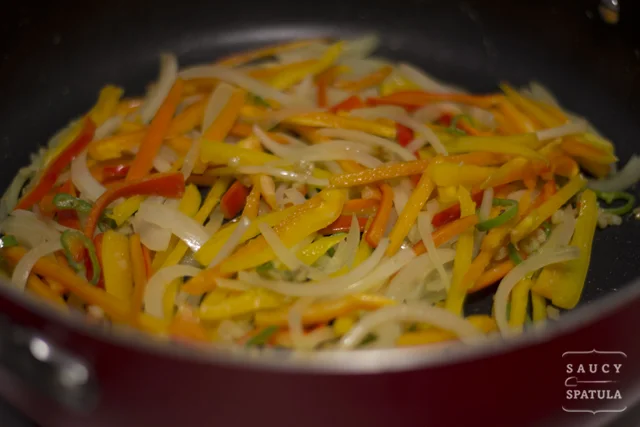
  • 1 cup diced bell peppers
  • 1 1/2 cups long grain white rice
  • 1 tbsp hoisin sauce
  • 2 tsp garlic chili sauce
  • 1 tsp dried thyme
  • 1 tsp oregano
  • 1 tsp garlic powder
  • 3 bay leaves
  • 3 cups chicken stock
  • 1/2 lb medium or large shrimp, shelled and deveined
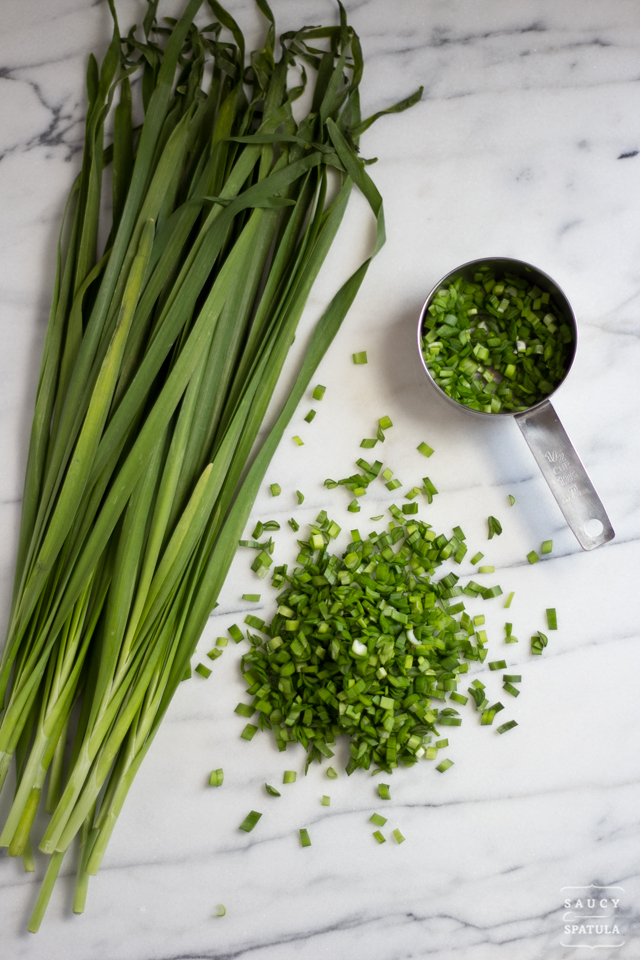
  • 3 stalks chopped scallion
  • 2 tbsp lemon juice
  • 2 tbsp soy sauce

Instructions

  1. Slice pork belly diagonally into 1/4" thick slices. Marinate with five spice powder for 30 minutes.
  2. Cut chicken into 1/2" cubes. Marinate with soy sauce and white pepper powder.
  3. Slice Chinese sausage into 1/8" slices. Set aside.
  4. Mince garlic and ginger, and dice turnip into 1/2" cubes. And dice bell peppers.
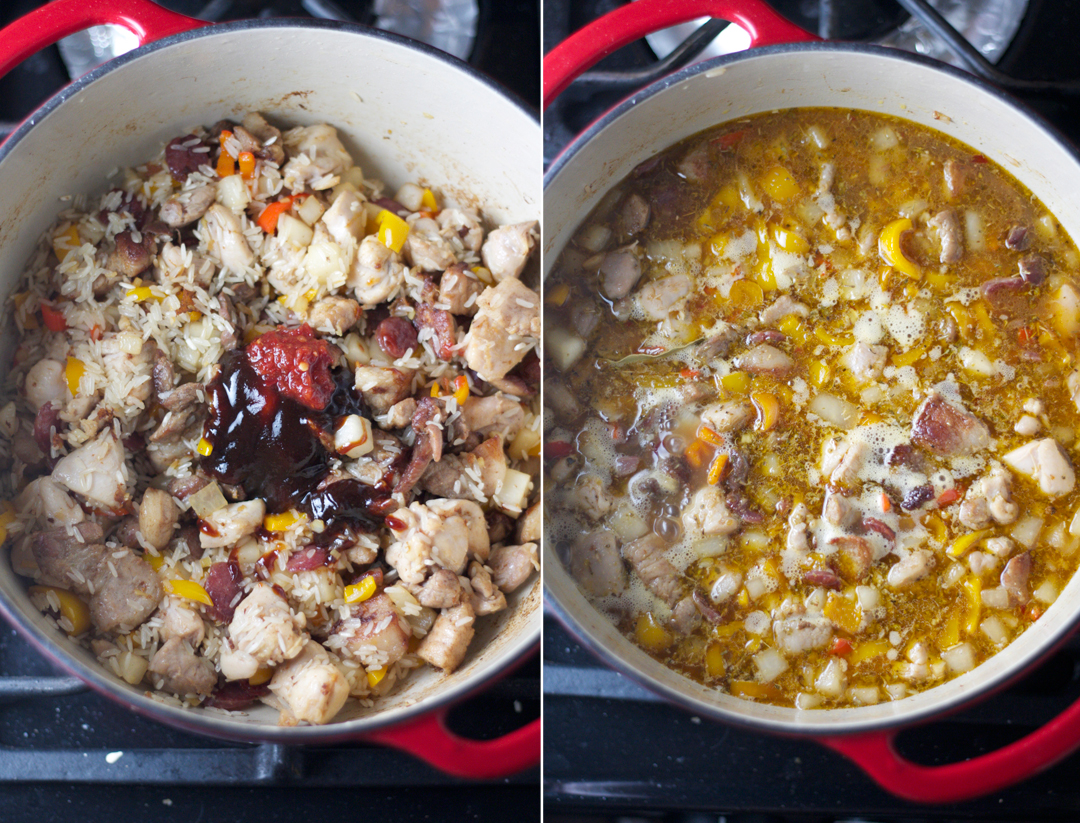
  5. Place a Dutch oven over medium-high heat, drizzle about 2 tablespoons of oil, and twirl the pan a couple times to spread oil evenly. Add pork belly, stir several times until meat is browned and caramelized, about 3 minutes. Remove from pan. Add chicken, and cook until it's no longer pink on the outside, about 2. Remove from pan. Add Chinese sausage and let it cook for 2 minutes. Remove from pan.
  6. Turn the heat down to medium, stir in garlic and ginger, cook for 30 seconds. Add turnip and bell peppers, and let it cook for 3 minutes, stir frequently.
  7. Stir pork belly, chicken, and Chinese sausage back into the pot. Add rice and stir. Add hoisin sauce, garlic chili sauce, thyme, oregano, and garlic powder, and stir one more time until everything is mixed well together. Throw in the bay leaves, then add chicken stock. Give it a quick stir, and turn the heat up. Once it boils, return the heat to low, cover and let it cook for 15 minutes.
  8. Sprinkle chopped scallion, and lay the shrimp on top, then drizzle with the lemon juice. Cover and let it cook for another 5 minutes, until shrimp has turn completely pink.
  9. Drizzle 1 to 2 tablespoons of soy sauce, then serve hot.

Ketchup Sriracha Shrimp

I love shrimp. And I love shell-on shrimp even more! Seafood is extremely easy to find in Hong Kong as it is surrounded by water. Did you know that there're actually 260 outlaying islands in Hong Kong? Islands like Cheung Chau, Peng Chau, Lamma Island, and Lantau Island are the most populated amongst them all. There're tons of fishing villages and historic sites that tourists often miss out on when they visit the Kong. The four major outlaying islands are pretty easy to get to by ferry which you can board from Central on Hong Kong Island. Plus, there are ferries that would take you from island to island. Sometimes I feel like even locals themselves don't realize just how amazing these outlaying islands are! Going to the islands is always an adventure for people who don't actually live there. After all, Hong Kong is not always about the hustle and bustle, especially when outdoor adventures are easily accessible within an hour or less. I'm talking about hiking, swimming, surfing, going to the beach, taking boat trips, eating fresh seafood, visiting fishing villages and old temples, etc. I can really go on and on about all the fun outdoorsy stuff in the Kong (as lately I'm doing some homework and begin to think about what kind of day trips I'd like to go on when I head back to Hong Kong NEXT MONTH!)

So, what brings me to this Ketchup Sriracha Shrimp? I think it's just the fact that it's another dish that reminds me of my mom's cooking. Her version, however, does not involve any sriracha or spiciness, just plain simple ketchup shrimp. But when I was putting this recipe together, adding sriracha just makes sense!

And you don't need a whole lot of sriracha either, 1/2 tablespoon is all you need to highlight the taste.

What else do you need other than ketchup to make this Ketchup Sriracha Shrimp? A tiny bit of rice vinegar, garlic, scallion, salt, and white pepper powder. My mom would often make her ketchup shrimp with whole shrimp, meaning with the heads and all. Fresh seafood, though, isn't always so easy find and widely available. I totally would have gone with fresh shrimp if it was easier and cheaper to get here! This time, I just settled on some good ol' frozen shrimp. Can you make this dish with shelled shrimp you may ask? You could... but I don't recommend it because it just won't give you the same flavor. Plus, how could you eat a Cantonese shellfish dish without the shells? It's like eating buffalo wings without bones. You just gotta stick with what's good here!

Tangy and sweet with a spicy kick. I just can't get enough of it!

Ketchup Sriracha Shrimp

Prep time: 10 mins  Cook time: 5 mins  Total time: 15 mins

Serves: 2

You'll need:

  • 1 lb frozen medium shrimp, shell-on and deveined
  • 2 stalks of scallion

Sauce:

  • 3 tbsp ketchup
  • 1/2 tbsp sriracha
  • 1 tsp rice vinegar
  • 1/4 tsp white pepper powder
  • 1 tsp salt
  • 1 tbsp minced garlic

Approach:

  1. Thaw frozen shrimp by running it under tap water for 5 minutes, in a colander. Give it a toss half way through to make sure it's getting thawed thoroughly. Then pat dry with paper towels.
  2. Chop scallion into 2" stalks, discard the white end parts. Then mix sauce ingredients together and set aside.
  3. Set a frying pan or skillet over medium-high heat, When the pan is hot, add some oil and twirl the pan to spread. Add shrimp to the pan. The shrimp should sizzle when it first come in contact with the pan. Saute the shrimp until it starts to turn pink on both sides. Cook until almost all the grey bits on the shrimp is gone but not totally, then add the sauce and scallion. Let it cook for another 20-30 seconds until the sauce has incorporated and shrimp has turn pink completely. It should take no more than 5 minutes to cook.
  4. Turn off the heat, plate, and serve hot.

Soy-glazed Black Pepper Chicken

THIS. This chicken dish will knock your socks off! It's Hakka recipe #2 I'm sharing with you this year and you're gonna LOVE it. You should already know by now that I adoreThe Hakka Cookbook by Linda Lau Anusasananan. This soy-glazed black pepper chicken recipe is what I'll be keeping for the rest of my life, and I'm not kidding here. It's one of the simplest chicken dishes you'll ever cook and it's got a big punch of flavors.

Linda had learned this chicken dish from a man named Ying Hsien who's father is a Hakka. Ying Hsien grew up in Northern India, and had moved to Toronto after the Sino-Indian war in the 60's because jobs became harder to find for the Chinese living in India. This soy-glazed black pepper chicken is what Ying Hsien learned from his mother in India, and I simply just can't believe that all it takes are four ingredients to produce such a distinct taste.

Don't let the color fool you! The chicken might look really really dark but it's not because the chicken is burnt. It's dark because of the use of dark soy sauce. I added water to the original recipe but if you're looking for a thicker, stickier sauce, adding less water to the pot will do the trick. The sauce will thicken up and reduce a bit as it cooks. I also deviated from the original cooking instructions and decided to sear the meat before braising which in my option makes a more tender bite. Searing will also change the overall texture by reducing fat from the chicken skin. And if you want to master this dish, use freshly cracked black pepper. It'll take you a few extra minutes of cranking on a black pepper mill but it'll enhance the spiciness of the dish by a mile.

Another tip when making this dish? Use a non-stick frying or saute pan. I love my Calphalon Contemporary Nonstick, and I don't think I can live without it. I've tried using my Lodge Dutch oven and another pan that wasn't non-stick, and the whole thing became a mess once the chicken and sauce started getting stuck to the bottom. It was not pretty and the sauce wasn't able to stick to the chicken as well as it could because it was mostly stuck on the pan. So I highly recommend using a non-stick!

And what's better to go with a super flavorful hunk of meat? WHITE RICE!

JUST LOOK AT THIS.

The outside is incredibly savory and aromatic while the inside is moist and tender. This is a dish I can devour everyday, hands down!

Soy-glazed Black Pepper Chicken

Prep time: 5 mins  Cook time: 50 mins  Total time: 55 mins

Serves: 2-3

You'll need:

  • 2 lbs bone-in chicken thighs with skin, about 6 pieces
  • 1 tbsp freshly cracked black pepper
  • 1/4 cup dark soy sauce
  • 3 tbsp water
  • chopped cilantro leaves, for garnish
  • white rice, optional

Approach:

  1. Trim excess fat off the chicken.
  2. Set a deep frying pan or dutch oven over medium-high heat. When the pan is hot, add oil and twirl the pan to spread. Sear each side of the chicken tights for 5 minutes. Remove most of the oil/fat except 1-2 tablespoons. Add freshly cracked black pepper, dark soy sauce, and water. Twirl the pan a few times to incorporate all the ingredients together. Once the sauce starts to boil, turn down the heat to medium-low. Let chicken to cook for 20 minutes, then flip them and cook the other side for an additional 20 minutes.
  3. Remove chicken from the pan or dutch oven, serve hot over white rice, garnish with cilantro.

Notes:

Adapted from The Hakka Cookbook by Linda Lau Anusasananan.

Chinese Long Beans with Ground Pork (豆角炒肉碎)

Remember when I wrote that post a while ago about my Hakka heritage? Well, I kinda promise myself that I'd cook more Hakka dishes for the blog this year, and this Chinese long beans with ground pork is one of them. It's a stir-fry so it's really easy to prep, and you can have dinner on the table in a jiffy!

In Cantonese, we call Chinese long beans "dau gok" (豆角), and they are also known as Yardlong beans (but they're really not a whole yard long, more like half a yard). You can find them at most Asian grocery stores or markets. I've been eating dau gok since I was a kid, and can tell you that Chinese long beans are a little "chewier" and has a stronger green bean taste than regular green beans, they're usually skinnier in thickness, darker in color (although there are a handful of variety and I know there's even purple ones!).

There are a few ingredients that make this Chinese Long Beans with Ground Pork a Hakka dish. The use of pork, soy sauce, and fermented black soybeans called "dau si" (豆豉) in Cantonese. Fermented black soybeans are usually sold dried but sometimes you can also see them being sold in jars which the beans are soaked in liquid/oil. I'm used to the dried kind, and you'd just soak them in water for a few minutes then drain.

Fermented black soybeans are used in a lot of Hakka dishes as they carry a robust flavor that can be added to many hearty Hakka cooking. And if you grew up in a Cantonese household, you would know that a can of "dau si leng yu" (豆豉鯪魚), dace fish and fermented black soybeans, can go a long way with just a bowl of warm rice on those cold winter nights!

This Chinese long beans with ground pork dish, though, it's one of many Hakka dishes that my mom would serve on any given day. It just reminds me of her cooking and sitting at dinner with my family!

Chinese Long Beans with Ground Pork (豆角炒肉碎)

Prep time: 15 mins  Cook time: 15 mins  Total time: 30 mins

Serves: 2-3

You'll need:

  • 1/2 lb ground pork
  • 1 tsp soy sauce
  • dash of white pepper powder
  • 1/2 lb Chinese long beans
  • 1/2 cup chopped onion
  • 1 tbsp minced garlic
  • 1 tbsp dried fermented black soybeans
  • Sauce:
  • 1/4 water
  • 1 tbsp Chinese Shaoxing wine
  • 1 tbsp soy sauce
  • 1/2 tsp sugar
  • 1/2 tsp cornstarch

Approach:

  1. Season the ground pork with soy sauce and white pepper powder. Set aside and let it marinate while you continue prepping.
  2. Rinse, and cut Chinese long beans into 1 1/2" long.
  3. Soak the dried fermented black soybeans in 1/4 cup of water for 5 minutes, then drain.
  4. Mix the sauce ingredients together.
  5. Set a wok or pan over medium-high heat. When the pan is hot, add oil and twirl the pan to spread.
  6. Add garlic and cook until fragrant, about 15 seconds. Then add chopped onion, and cook for 1 minute. Add the ground pork and cook for 3 minutes, then add the fermented black soybeans. Add Chinese long beans and sauce, cover, and let it cook/steam for 3 minutes. Uncover, and cook for another 5 minutes.

Notes:

Adapted from The Hakka Cookbook by Linda Lau Anusasananan.

Beef and Shredded Lettuce Fried Rice (生菜牛肉炒飯)

Hello! I know it's been a while since I've shared a recipe but I've just been super busy this holiday season! I'm currently sweating over my 2014 holiday project (check out what I did for the last three years!) Every year, I look forward to December to work on something special like this and I can't wait to share with you all the final product! So today I thought I'd share with you a quick recipe since everyone is spending most of their time prepping for the holidays, and would probably want to stir up dinner quickly! This dish is one of my favorites when it comes to Hong Kong style classics - the Beef and Shredded Lettuce Fried Rice (生菜牛肉炒飯).

Fried rice is one of my comfort foods. And I'm not taking about fried rice from your neighborhood Dragon Palace or Szechuan Garden. I wouldn't eat fried rice from those places even if it's free. It's not them. It's me. (well, it is kinda them a little.) I can't picture people visiting from Italy would want to eat at Olive Garden so forgive me if I'm picky about my fried rice!

I have a handful of favorite Hong Kong style fried rice - the Salted Fish and Chicken Fried Rice (鹹魚雞粒炒飯) is unique, the Yeung Chow Fried Rice (揚州炒飯) is one of the most basics. The Beef and Shredded Lettuce Fried Rice (生菜牛肉炒飯) which is usually made with ground beef but I went with thinly sliced flank steak instead for this recipe.

And I know what you're thinking - cooked lettuce? It's really not as bad as it sounds if you've only been eating raw lettuce all your life. Cooked lettuce with oyster sauce is quite common on the Cantonese dinner table, and one of my go-to veggie as a kid. The trick for cooking lettuce is not to cook it for too long - you want it to be still slightly crispy and definitely not mushy.

I folded in the shredded lettuce into the rice just a few minutes before I turned off the heat. And for the beef, I changed it up by using thinly cut flank steak instead of ground beef. Flank steak is an awesome cut of meat and it's great for marinating. For this recipe, you don't need a whole lot of beef so half of a pound is enough. And like any other fried rice, day-old rice is your best bet. Making fried rice with fresh made rice is sticky business and you don't want to go down that road of eating rice lumps.

So there you have it! An authentic Hong Kong style fried rice made with cooked lettuce which might just surprise ya!

Beef and Shredded Lettuce Fried Rice (生菜牛肉炒飯)

Prep time: 30 mins  Cook time: 15 mins  Total time: 45 mins

Serves: 2

You'll need:

  • 1/2 lb flank steak, cut into paper-thin slices
  • 5 tbsp soy sauce
  • 1 tsp minced garlic
  • 1 tsp brown sugar
  • 1/2 tsp white pepper powder
  • 1/2 tsp salt
  • 1/4 tsp black pepper
  • 1 tsp rice wine
  • 5 tbsp olive oil
  • 4 cups cooked, day-old rice
  • 2 eggs, beaten
  • 1/4 head of lettuce, shredded or sliced into 1/4 inch thick
  • Optional:
  • [url href="http://www.huyfong.com/no_frames/garlic.htm" target="_blank"]Huy Fong chili garlic sauce[/url]

Approach:

  1. Remove day-old rice from the fridge and let it return to room temperature.
  2. Slice flank steak against the grain to paper-thin slices.
  3. Mix the beef with 3 tablespoons of soy sauce, minced garlic, brown sugar, white pepper powder, salt, and black pepper, and rice wine. Let it marinate for at least 20 minutes.
  4. In a heated skillet or wok over high heat, add beef and cook for 5 minutes. Remove beef and set aside.
  5. Add 3 tablespoons of olive oil to the pan, add rice and let it cook for 3-4 minutes. Stir and break apart the bigger lumps. Add the eggs and stir them into the rice. Keep egg pieces small by stirring occasionally. Drizzle more olive oil if needed. Add the beef back into the pan and cook for an additional 3 minutes. Season with more salt and pepper, and 2 tbsp of soy sauce.
  6. Lastly, fold in the shredded lettuce and cook for 2-3 minutes.
  7. Serve hot with chili garlic sauce.

Chicken Meatball Noodle Soup with Watercress

Ahhh. Soup. I seriously cannot live without it in the winter! (Did anyone enjoy this week's arctic blast here in NY?... didn't think so.) Chicken noodle soup is one of my favorite things to eat especially during these cold, dark winter days. I wanted to do something a little different and unexpected so I put a Chinese spin on this classic soup!

You know, growing up, soup was served almost every night along with dinner. Although, Chinese soups tend to be much more brothy and are eaten as health supplement rather than full-on meals so it never seems "heavy". After all, Chinese dinners are all about having a well-balanced diet, and soup completes a meal quite nicely.

This chicken meatball noodle soup with watercress has pretty much everything a healthy meal could offer. And why not get an upgrade from a traditional chicken noodle soup when you can have it all?! Watercress (西洋菜) is a very common ingredient in Chinese soups and it's got some really great health values (apparently it's really good for the flu or cough!). Besides soups though, I really haven't cooked anything else with watercress before. Do you like watercress? What are some of the things that you like to make with it?

To make this soup, you'll learn how to roll/form meatballs with spoons. And trust me, it's not rocket science, just needs a bit of patience and time! Is it technical? Naaah. You've got this - it's actually quite fun! And just to add some more texture, I added egg-drop-soup-style eggs! Now, here's to a complete meal - cheers! (or should I say.. Slurp!)

Chicken Meatball Noodle Soup with Watercress

Prep time: 30 mins  Cook time: 40 mins  Total time: 1 hour 10 mins

Serves: 4

You'll need:

  • 4 cups chicken broth
  • 4 cups water
  • 1-2 cups chopped watercress
  • 2 cups wide egg noodles
  • 2 large eggs
  • 1 tbsp salt
  • Meatballs:
  • 1/2 cup yellow onion, grated
  • 1/2 cup chopped watercress
  • 1 large egg
  • 1 tbsp minced garlic
  • 1 tsp salt
  • 1/2 tsp black pepper
  • 1/2 tsp white pepper powder
  • 1 lb ground chicken
  • 1/2 cup breadcrumbs

Approach:

  1. Rinse and drain watercress thoroughly. Chop it by hand or use a food processor.
  2. Bring the chicken broth and water in a stock pot until it starts to boil, then turn the heat to low.
  3. In a bowl, mix the first seven meatball ingredients together. Add chicken then breadcrumbs.
  4. Once the chicken broth is ready, use 2 small tea spoons to form meatballs by first scooping a small lump of the meat with 1 spoon, then passing it back and forth between spoons a few times. Try to make them as round as possible but doesn't need to be perfect. Carefully drop each one into the stock pot until all the meatballs are in. (Meatballs will sink to bottom at first but will raise as they're done being cooked, and will float up top.)
  5. Add the other chopped watercress and salt, and let the soup simmer for 20 minutes.
  6. Beat the 2 eggs, then stream them into the soup slowly while stirring with a ladle.
  7. Add the egg noodles last, about 10 minutes before serving, to make sure they don't get overcooked.
  8. Top with oyster or saltine crackers (optional).

Chinese Broccoli with Chinese Sausage

Kai Lan (Chinese broccoli) is one of my favorite vegetables! It's a little like broccoli, a little like broccolini, a little like kale and mustard greens. If you were to combine all of the veggies above, you'd pretty much get Chinese broccoli. You've probably seen Kai/Gai Lan on the menu at Chinese restaurants or other Southeast Asian cuisine like Thai or Vietnamese. It's a cold-weather vegetable so fall and winter would be the best season to eat Chinese broccoli (although it's not hard to find year-around, it may be limited at the market during off-season). The literal translation of Chinese broccoli, Kai/Gai Lan, means "mustard orchid" so it is definitely in the mustard greens family. The leaves have a similar thickness and characteristic of kale but tougher. And the stem is a lot like the regular broccoli but bitter. How about broccolini? Part of the family? Yep! The broccolini is a hybrid of Kai Lan and broccoli that the Japanese had married together some years ago.

I remember my mom making this Chinese broccoli with Chinese sausage (Lap Cheong) dish often in the winter in my younger days. And as a picky-eater, this was one of the few dishes that I'd just gobble up along with a bowl of freshly made rice. The drizzle of soy sauce is key! This is definitely a dish that reminds me of those cold nights having dinner with my family.

Do you have a dish that reminds you of winter from childhood?

Chinese Broccoli with Chinese Sausage

Prep time: 15 mins  Cook time: 15 mins  Total time: 30 mins

Serves: 2

You'll need:

  • 1-2 Chinese sausage, sliced, about 4 tbsp
  • 1 tsp olive oil
  • 1 tsp sesame oil
  • 3 garlic cloves, sliced
  • 1/2 lb Chinese broccoli (Kai Lan)
  • 3 tbsp chicken broth
  • 1/4 tsp sugar
  • 1/2 tbsp soy sauce
  • salt and pepper, to taste

Approach:

  1. Rinse and drain Chinese broccoli thoroughly. Cut the leaves roughly, about 1/2". And slice the stems thinly on an angle, about 1/8".
  2. Slice the Chinese sausage on an angle, also about 1/8".
  3. Heat a skillet on medium-high and add olive oil. Twirl the pan around to spread the oil somewhat evenly on the pan. Add Chinese sausage and cook for 3 minutes, until it's turned slightly transparent. Remove from pan into a bowl.
  4. On the same skillet, add sesame oil and garlic. Let it cook until fragrant, about 12 seconds. Add Chinese broccoli and chicken broth, and let it cooking for 4 minutes, stir occasionally.
  5. Add Chinese sausage, sugar, and soy sauce and cook for another 4 minutes.
  6. Plate and serve with rice on the side.

Chicken and Broccoli Baked Rice Hong Kong Style

As a former British colony, Hong Kong cafes or Cha Chaan Tengs have adapted many western ingredients such as cheese, milk, spaghetti, and tomato sauce. That's really how many iconic Hong Kong dishes were born. (Remember that Spaghetti Bolognese I made a while back?) Well today, I'm sending your way another popular dish (made with own my twist) that's fairly common in the Hong Kongese diet. I've been wanting to make a Hong Kong style "baked rice" with cream sauce for a long time but couldn't get pass the idea that I'd have to use cream soup that comes in a can. Until, earlier this week, I discovered how to make it from scratch and decided that it is time to tackle what I though was complicated but turned out to be untrue!

I grew up eating what people of Hong Kong often refer to it as "baked rice" (焗飯) which is kind of like a casserole or a gratin. See, the rice doesn't actually get cooked in the oven like you think it would judging by the name. Lost in translation perhaps?? What it really consists of are simple: meat or seafood on a bed of rice or spaghetti, topped with either tomato sauce or cream sauce, and a layer of cheese on top. You pop it in the oven until the cheese has melted to golden brown. Not feeling plain white rice? Many places would let you substitute it with a simple egg fried rice. And that's what a Hong Kong style "baked rice" is all about!

On one hand, the baked pork chop with rice (焗豬扒飯) is probably the most well-known in the baked rice arena which my friend over at The Missing Lokness had posted a recipe if you're ever interested in making an iconic Hong Kong dish. While the baked pork chop with rice is made with tomatoes and tomato sauce, I'll be sharing with you another kind of baked rice dish today that is made with a cream sauce!

Say hello to this Chicken and Broccoli Baked Rice. Perfect to make for dinner for two! Remember earlier I said the cream sauce is actually really easy to make? Well, get some chicken stock, heavy cream, a dab of butter mixed with flour, and a little white wine in a sauce pan! And don't forget a dash of salt and pep!

Baked rice with cream sauce in Hong Kong is often served with a seafood medley but considering that seafood is not always available to everyone, I thought using chicken and broccoli would be the perfect substitute! And the best part about this dish? It can be versatile so you can ditch the rice and go with pasta if you like!

So go cream that sauce and melt some cheese for dinner!


Chicken and Broccoli Baked Rice Hong Kong Style

Prep time: 25 mins  Cook time: 10 mins  Total time: 35 mins

You'll need:

  • 1 tbsp extra virgin olive oil
  • 1 tsp minced garlic
  • 2 cups broccoli florets
  • ½ lb chicken breast, cut into bite-size pieces
  • ½ tbsp unsalted butter, melted
  • 2 cups of cooked white rice
  • 6 tbsp shredded mozzarella cheese
  • 1 tbsp dried basil
  • Sauce:
  • ½ cup chicken stock
  • ½ cup heavy cream
  • ¼ white wine
  • 1 tbsp unsalted butter, soften
  • 1½ tbsp flour
  • salt and pepper, to taste

Approach:

  1. Preheat oven to 450°F.
  2. In a sauce pan, add chicken stock, heavy cream, and white wine. Cook on medium heat until it starts to boil then turn the heat on low.
  3. Heat another sauce pan with 3 cups of water (for blanching the broccoli in the next steps).
  4. Mix butter and flour together to form a paste. Stir it into the sauce until the big lumps have melted. Add salt and pepper to taste.
  5. Leave sauce cooking on low for 10 minutes while it reduces and thickens.
  6. Blanch the broccoli for a few minutes, then drain.
  7. In a heated skillet, add olive oil and minced garlic. Cook until fragrant, about 10 seconds. Add chicken and cook for 4 minutes, then toss in broccoli and cook for another 6 minutes.
  8. To assemble each of the two dishes, brush the melted butter on the bottom of the gratin dish, add 1 cup of rice, half of the chicken and broccoli, 4 tbsp of cream sauce, and 3 tbsp of shredded mozzarella cheese.
  9. Put both gratin dishes on a baking sheet and bake for 10 minutes, until cheese has melted and turn golden brown.
  10. Garnish with a sprinkle of dried basil on top.

Steamed Egg Custard (臘腸蒸水蛋)

If you ask my mom today, she would probably agree that I was once a very picky eater. And not only I was picky, I was always the last one to finish at the dinner table. I was a fussy kid who didn't like much of anything. And now I blog about food? Who would have thought?! Since I only liked a handful of things at the dinner table growing up, steamed egg custard (蒸水蛋) and I bonded like how American kids fell in love with mac & cheese. A plate of hot steamed egg custard fresh out of the wok with soy sauce pour all over on top. It's a simple comfort home cooking I know many Cantonese and Hong Kongers can relate to. Taking a spoonful out of the soft egg custard immediately creates a dent where soy sauce would rush in and fill the hollow space.

Steamed egg custard is one those dishes that reminds me of home as soon as I put the silky and savory bite in my mouth. While there are a few different versions of steamed egg custard, this is how I like to enjoy mine - with crunchy Chinese sausage bits!

The dish is usually made plain with just eggs and water. It can also be made with with baby shrimp or ground pork, and even sliced preserved eggs (皮蛋) which never looks appetizing. However the custard is made, it's commonly served with a thin layer of soy sauce on top, and garnished with a sprinkle of chopped scallion.

Here's what I did with the Chinese sausage. I chopped it into small chunks then I threw them into a food processor for a few seconds.

You then toss them on a hot pan for a minute or so, and you'll get these crispy sausage bits. A lot like bacon bits that you put on a salad but 1,000 times better!

Next, the eggs. Like I mentioned earlier, steamed egg custard is usually made with just water which is good. What makes creamier and better custard is milk. And low-fat milk would do just fine. After beating the eggs and mixing in with other ingredients, you should either strain it or use a small sieve to remove any outstanding foam or bubbles so the surface of the custard remains smooth when steaming.

Set up your steaming wok or pan on low heat and set the timer for 18 minutes. And note that the higher the heat, the less smooth your custard will turn out. So if it is your first time making steamed egg custard, keep an extra eye on the money and observe the magic of steaming!

It's very common that you'll see little honeycomb-like texture in your steamed egg custard. And you'd see more of it if the heat was on too high while steaming. While some people like their steamed egg custard perfect with no honeycomb-like texture at all, to me, a little bit of it is the imperfection I look forward to when I make steamed egg custard. It's part of what makes it airy and a bit fluffy.

What's your steamed egg custard story? How does your family prepare this classic Cantonese dish at home? Share with us in the comments below!

Steamed Egg Custard (臘腸蒸水蛋)

Prep time: 10 mins  Cook time: 20 mins  Total time: 30 mins

You'll need:

  • 4 large eggs
  • 1 cup low-fat milk
  • ¼ salt
  • 4 drops sesame oil
  • 1 Chinese sausage
  • 1 stalk scallion, chopped
  • 1 tbsp soy sauce

Approach:

  1. Prepare a small skillet over medium heat.
  2. Cut Chinese sausage into small chucks, then throw them into a food processor and process for a few seconds, until finely chopped.
  3. Add 2 drops of sesame oil into the hot pan, then add chopped sausage. Cook for about 1 minute until it becomes slightly crispy. Then set aside.
  4. In a medium mixing bowl, whisk together 4 eggs, plus 1 cup of milk, salt and 2 drops of sesame oil, until well-combined.
  5. Using a small sieve, fish out any outstanding foam on top and on the side.
  6. Next, set up your wok with a steaming rack with 1" of standing water. Place an empty dish, that holds at least 2 cups of liquid, in the middle on top of the rack. Carefully pour eggs into the dish. Turn the heat on low, and set the timer for 18 minutes.
  7. When it is done, egg custard should be springy to the touch, and a bit jiggly.
  8. Let it rest for 1 minute, then top with 1 tbsp of soy sauce, crispy sausage bits, and chopped scallion.
  9. Serve hot.

Notes:

For your reference, this is what a steaming rack looks like.

Eggs to milk ratio should be 1:1. 

Black Pepper Beef Sliders

Here we go with the Cantonese-inspired sliders series #2! What did you think of the sweet and sour chicken sliders I posted a couple days ago? If you're reading this, I take it that you're interested to find out this next one I have for you as part of the sliders series? In that case, I'm seriously thrilled that you're here! And if you just happened to stumble upon this post, I'm glad that you're here too!

Do you rememeber a while ago I shared with you a recipe for Hong Kong style black pepper sauce? Well, today we're putting that to use. Black pepper sauce is quite common on the menu at tea restaurants and western-style restautants in Hong Kong. It's a sauce that usually goes along with grilled chicken or steak/beef, often served on a bed of white rice or spaghetti. I obviously grew up loving the dish so how could I not put that to use when I'm crafting some Cantonese-inspired sliders!?

And no, neither there is spaghetti in these sliders nor the buns were made out of rice. I'm not that crazy (but maybe I should be)? You be the judge, and let me know in the comments below! Beside black pepper sauce, Hong Kongers are quite fond of beef brisket which is what I used for these sliders. Even on a hot summer day, locals enjoy their beef brisket noodle soup 牛腩麵 (sometimes with a side of wontons) while taking shelter from the scorching hot weather with blasting air-con indoors. Beef brisket is also commonly enjoyed with curry (Curry Beef Brisket 咖喱牛腩) or with choy sum (菜遠牛腩).

When I thought of making beef sliders, brisket just came to my mind like second nature since it's my favorite cut of beef. I think matching it with black pepper sauce and some homemade pickles was a wise choice, and the flavors came out just right!

So kick back, and enjoy a beer with these Black Pepper Beef Sliders!

Don't forget to check out Part 1 of the Cantonese-inspired sliders series:
 Sweet and Sour Chicken Sliders

Black Pepper Beef Sliders

Prep time: 5 hours 10 mins  Cook time: 30 mins  Total time: 5 hours 40 mins

Serves: 6

You'll need:

  • 6 Martin’s “sliced potato rolls”
  • 1 lb beef brisket
  • some homemade pickles
  • Marinate:
  • 1 tbsp olive oil
  • 1 tbsp garlic, minced
  • 3/4 cup yellow onion, finely chopped
  • 1 tbsp shaoxing (紹興) rice wine
  • 3 tbsp ketchup
  • 1/2 tbsp Worcestershire sauce
  • 1/4 cup soy sauce
  • 1/4 cup water
  • 1/2 tbsp freshly ground black pepper
  • 1 tsp sugar

Approach:

  1. Cut beef brisket into 2″ strips, then arrange them in a baking dish or toss them in a large ziplock bag.
  2. Combine marinate ingredients.
  3. Pour 2/3 of it into the baking dish or ziplock bag with the brisket, and give it a quick stir. Refrigerate for 5-6 hours, and give it another stir mid-way through.
  4. minutes before you’re ready to cook the brisket, remove it from the fridge, and let it sit and return to room temperature.
  5. Using a sauté pan on medium-high heat, cook the brisket for 10 minutes with all of its marinate. Then, cover with lid and simmer for another 20 minutes. Taste test the tenderness of the meat from time to time. In my experience, the longer you cook a brisket, the more tender it gets.
  6. Remove brisket from the pan, leaving the sauce. Let the meat rest for a few minutes on the cutting board before slicing.
  7. Pour the rest (1/3) of the marinate into the pan, let it simmer until the onion has soften and the sauce has thickened.
  8. Toast 6 buns in the toaster oven (butter lightly if you like).
  9. To assemble, take slices of brisket, top with sauce and then some pickles.
  10. Serve immediately (like now!)

Sweet and Sour Chicken Sliders

Helloooo summer! What have you done so far to celebrate the return of summer? Have you jumped into the water yet? Gone on any road trips? Had any picnics at the park with friends? Speaking of picnics, I've got an idea for you the next time you're needing to make something to bring to a picnic. For the next couple weeks, I'll be rolling out four Cantonese-inspired sliders recipes. I'm taking inspiration from some classic Cantonese dishes and turning them into a bao form! Are you ready to find out more about the first one in the series?

If you liked my sweet and sour pork (咕嚕肉) last time, you'll love these sweet and sour chicken sliders even more! Why? Because it‘s made with fried chicken wings! Yes... you heard it correctly. There's something so satisfying about fried chicken wings. Agree? It's the super crispy and crunchy skin that keeps winning every single time. I used my go-to fried chicken recipe (heavily adapted from Kenji's), and was again blown away by the result. Thank you Kenji! After frying the wings, I let them cool down for a few minutes before deboning them. Give them a rough chop on the cutting board and now they're almost ready to go on the bun.

To complete the full sweet and sour chicken experience, how can we forget the pineapple, bell peppers, and homemade sweet and sour sauce?

Voilà.

Take a bite of this classic Cantonese dish with a twist. And don't forget to come back later this week for the Cantonese-inspired sliders series no.2!

Sweet and Sour Chicken Sliders

Prep time: 15 mins  Cook time: 40 mins  Total time: 55 mins

Serves: 6

You'll need:

Approach:

  1. Slice pineapple and bell peppers. Make sweet and sour sauce. Set aside.
  2. Fry chicken wings by following the direction on my fried chicken recipe. After frying, let chicken cool down for a few minutes then debone and chop up roughly.
  3. Toast 6 buns in the toaster oven (butter lightly if you like).
  4. Toss the chopped up fried chicken along with sliced bell peppers in a medium mixing bowl. Drizzle with sweet and sour sauce, and combine well.
  5. To assemble, lay pineapple ring on each bun, and top with sweet and sour fried chicken.
  6. Serve immediately.

Hakka Stuffed Tofu (釀豆腐)

The fact that I am Hakka but have not yet featured a Hakka recipe on the blog is simply a crime. I can't say that I learned everything that I know about Hakka cooking from my Ah Gong (grandfather) who cooked and used the kitchen way more than my Po Po. But I can say that my desire to cook was partly influenced by him. And if you know me, you'd understand my craze for feeding a crowd. All that, was much influenced by my gigantic Hakka family. I mean, how can I not when I basically saw my entire extended family every, single, weekend growing up? A house full of 25-30 people? Checked. Food? DOUBLE CHECKED!

Being a Hakka in Hong Kong isn't all that out of the ordinary. There are many Hakka villages spread around the New Territories that are very much populated. People move around as lands develop so Hakkas living outside of villages are becoming very common these days. While a reasonable amount of Hong Kong-born-and-raised Hakkas had moved overseas, the Hakka tradition lives on with a handful of regular celebrations and gatherings throughout the year.

Have I bored you yet with my mumbo jumbo? Let's go back to the topic of today and talk food! You can certainly read more about my Hakka heritage in the Proud to be Hakka post I wrote a while back!

There are many classic Hakka dishes like the Stuffed Tofu (釀豆腐) that people would consider or have mistaken as Cantonese. The truth is, both cultures share a lot of similarities in cooking, and have been adapting and borrowing from each other for quite some time. With its rich migration history, dishes like Stuffed Tofu (釀豆腐) travels with the Hakka people wherever they land. To me, food is always about adapting and that's what makes food universal and interesting. When Hakkas take dishes with them to live somewhere else, they adapt local flavors, ingredients, and techniques. According to Linda Lau Anusasananan, when the Hakkas moved to southern China a long time ago, wheat wasn't widely available to make dumpling wrappers so they adapted by using tofu instead.

I don't expect Stuffed Tofu (釀豆腐) in other Hakka-influenced Chinese communities around the world to be all the same. The standard and common ingredients for Stuffed Tofu (釀豆腐) requires, of course, tofu. The filling is mostly pork but it can sometimes be mixed with fish or shrimp. The filling can also be used to stuff other vegetables like bell peppers and eggplant. While some people stuff the filling with tofu pockets, I always like to make the open-face version of Stuffed Tofu (釀豆腐). For sauces, soy sauce is used most of the time as well as oyster sauce, and fish sauce for Hakka Chinese who had migrated to South East Asia. Some like to steam, others prefer to deep-fry (I like to pan-fry), and each cooking method has its own beauty really. You could also choose to make a braised stuffed tofu dish after the tofu has been fried. Pan-frying, for me, produces the right balance of slightly crispy on the outside and soft on the inside. It's really one of the perfect ways, one of my favorite ways, to eat tofu.

Learn more about Hakka cooking, culture and history from Linda Lau Anusasananan in The Hakka Cookbook. Available on Amazon.


Hakka Stuffed Tofu (釀豆腐)

Prep time: 35 mins  Cook time: 5 mins  Total time: 40 mins

Serves: 12 pieces, 2"x2"

You'll need:

  • 1 lb (1 block) firm tofu
  • ½ lb ground pork
  • 1½ tsp minced fresh ginger
  • 2 tsp Shaoxing cooking wine
  • 3 dashes of white pepper powder
  • ½ tsp salt
  • 1 tsp sesame oil
  • 2 stalks scallions, finely chopped
  • ½ cup corn starch

Sauce:

  •  ½ cup chicken stock
  • 1 tbsp oyster sauce
  • 1 tbsp soy sauce
  • ½ tbsp dark soy sauce
  • 1 tsp corn starch and 2 tbsp water, mixed

Garnish:

  •  1 stalk scallions, finely chopped

Approach:

  1.   
  2. Extract excess water from tofu by sandwiching it with few sheets of paper towels on a plate (underneath and on top of tofu). Using something considerably flat and heavy, gently place it on top and center of tofu for about 10 minutes.
  3. Mix ground pork with minced ginger, cooking wine, white pepper powder, salt, sesame oil, and scallion.
  4. Prepare, and set aside the ½ cup of corn starch in a medium size bowl (for coating tofu later before frying).
  5. Prepare the sauce by heating up sauce ingredients (minus the corn starch mixture). Once it starts to boil, turn the heat down to simmer. Stir in corn starch mixture slowly which will start to thicken up the sauce. Continue stirring for another 30 seconds, then turn off the heat.
  6. Slice tofu into 12 pieces. Then make a cavity in each piece using a teaspoon as a scoop. Save tofu scraps for another use if you wish. Stuff each tofu with roughly 1 tbsp of pork filling.
  7. Heat up a cast iron pan with some oil. Carefully pick up stuffed tofu pieces, and coat them with corn starch on all sides (shake off the excess gently). Place them on the hot pan with filling side down. Cook for about 2 minutes, then flip them over with a spatula and cook for 2 more minutes. Add more oil to the pan as needed.
  8. Plate, then sauce. Garnish with finely chopped scallion. Serve immediately.

Pan-fried Noodles with Soy Sauce (豉油皇炒麵)

What is a classic dish? Something traditional? Something that has survived through time that this ever-changing culture does not get tired of? Something so good, and so true to an identity that it has been stamped with a "no further modification needed"? Classic dishes live among all cuisine, and for the Cantonese, this Pan-fried Noodles with Soy Sauce (豉油皇炒麵) is definitely one of them.

Noodle is everything in a lot of Asian people's diet. Okay, a majority if not everything. I had recently pointed out my love for noodles. And if you must know, I eat some sort of noodle at least once a week (twice, if you count pasta). Anyway. What I admire about dishes like the pan-fried noodles with soy sauce is that it holds the ability to keep its cool over the years, sort of like flying low under the radar. The dish has not changed and very rarely you'd get a modified version. Pan-fried noodles with soy sauce is as basic and simple as a stir-fried noodle dish can get. There're only four things you need to make this authentic dish: egg noodles (either dried or fresh), bean sprouts, scallions, and soy sauce. (Well, two kinds of soy sauce.) It's not a fancy dish, and it doesn't need to be. Ever.

If you're traveling to the "kong", you'll come across pan-fried noodles with soy sauce in a lot of places. Almost all jau lau 酒樓 (big restaurants that can hold lots of banquet-size tables and mainly serving Cantonese cuisine and Dim Sum), Da Pai Dong, Cha Chaan Teng, fast food places like Café de Coral (大家樂) or Fairwood (大快活), and congee shops. Congee is pretty much the partner in crime to pan-fried noodles with soy sauce. The perfect match for locals who prefer a Chinese breakfast today because a western style breakfast was eaten yestetday.

Many Asian cultures eat noodle or rice for breakfast. Singaporean has their bee hoon, and Vietnamese has their bun. In Cantonese, calling someone a "rice bucket" simply means that person eats a lot of rice. I'm definitely the noodle version. Does that make me a "noodle bucket"? That just sounds ridiculous.

Slurp. Slurp.


Pan-fried Noodles with Soy Sauce

You'll need:

  • ½ lb egg noodles, dried or fresh (pan-fried not wonton noodles)
  • 3 stalks of scallion, cut into 1" pieces
  • ½ cup bean sprouts, rinsed
  • 1 tbsp dark soy sauce
  • 2 tbsp regular soy sauce
  • Some oil

Approach:

  1. If using dried egg noodles, blanch them in hot water first until el a dante. It'll take about 3 mins after water has boiled. Drain, and set aside.
  2. In a hot pan, add 2 tbsp of oil. Rotate the pan to spread oil throughout the cooking surface. Add noodles and cook for about 4 minutes, stirring frequently with a pair of chopsticks or tongs. Then add scallion, bean sprouts, and both kind of soy sauce. Stir and cook for 4 more minutes. Serve immediately.

Notes:

If you encounter dryness while cooking the noodles, add water 1 tbsp at a time.

Singapore-Style Rice Vermicelli (星洲炒米)

I don't just like this dish, I LOVE this dish. In a way, Singapore-Style Rice Vermicelli (星洲炒米) (Singapore rice noodles or Singapore Mei Fun) is part of the identity of Hong Kong cuisine. It's a dish that every Hong Konger is familiar with growing up along with other east-meets-west fusion fairs that you can find in a Cha Chaan Teng. Now, listen, you can't find this dish in Singapore. It's not that they don't eat stir-fried rice vermicelli there (they DO!), it's just not the same thing with the same taste. So why is Singapore-Style Rice Vermicelli (星洲炒米) called Singapore-style rice vermicelli then?

Well, let me take a step back real quick and mention that an authentic Singapore fried rice vermicelli is actually called fried bee hoon which does not include curry, nor it is spicy. Fried bee hoon can be considered as "street food" because it's served in a lot of cooked food centre or food hawkers in Singapore, and it's fast, cheap, and filling (and often eaten as breakfast). Learn how to make economical fried bee hoon from Whisk and Knife.

So... where did the curry come from in most of the Singapore-style rice vermicelli dishes outside of Singapore? I have not been able to find the true answer but many seem to think that the curried rice vermicelli dish was born in Hong Kong's Cha Chaan Tengs. And because it's cooked with curry and it's very similar to fried bee hoon, "Singapore Noodle" was created.

The kind of rice noodle used in Singapore-style rice vermicelli (星洲炒米) should be very thin so Mei Fun (米粉) is used often. I found the Wai Wai brand to be the best when cooking stir-fry noodles because the soaking time is short, and the texture is just right.

I was soaking three pieces of rice vermicelli but two are actually enough for this recipe. Remember to use warm water. I've cut them into halves so they can all be submerged. Plus, it's easier to stir-fry noodles that have been broken up. To save time, soak the dried noodles while you prep for the other ingredients which takes about 15-20 minutes.

Here I have everything cut up and ready to go! Stir-fry happens quickly so you don't want to get held up while things are already getting cooked in the wok. When I was at the store, I saw these small bell peppers so I used them instead of just a red bell pepper. Here I also have half of an yellow onion, 2 cooked and sliced eggs, some char siu, and some minced garlic and grated ginger. If you like to eat spicy, some hot pepper slices would be good, too.

And what can I say? :) I just can't get enough of Huy Fong's chili garlic sauce! It's just the perfect condiment for this singapore style rice vermicelli!

Singapore-Style Rice Vermicelli (星洲炒米)

Prep time: 15 mins  Cook time: 15 mins  Total time: 30 mins

Serves: 2

You'll need:

  • 2 pieces of Wai Wai brand dried rice vermicelli
  • 4 garlic cloves, minced
  • 1 tsp peeled and grated fresh ginger
  • 8-10 medium raw shrimp, shelled and deveined
  • 1/2 lb char siu, thinly sliced
  • 2 eggs, beaten, cooked, and sliced
  • 1 cup of red bell pepper, thinly sliced
  • 1/2 medium yellow onion, thinly sliced
  • a few slices of long hot green peppers

    Sauce:
  • 5 tbsp soy sauce
  • 2 tbsp cooking wine
  • 2 1/2 tsp curry powder
  • 1/2 tsp sugar
  • 1/2 tsp white pepper powder

Approach:

  1. Start by soaking the dried rice vermicelli in a large mixing bowl with some warm water while prepping for other ingredients. You may choose to cut them down in halves, in order for them to be fully submerged.
  2. Mix the sauce together and set aside.
  3. In medium-high heat, drizzle some oil in the pan or wok. Cook the shrimp for about 2 minutes each side then set aside.
  4. Drain the rice vermicelli. (For easier stirring while cooking it with all the other ingredients, you may choose to cut the noodle down roughly. I like it this way also because it’s easier to eat, shorter noodles make better “bite sizes”. But that’s just a completely personal taste.)
  5. Drizzle some oil in the pan/wok. Cook the garlic and ginger until fragrant, then add all the vegetables. Cook for 3-4 minutes until soften or until onion is transparent in color. Set aside.
  6. Drizzle some more oil in the pan/wok. Cook the rice vermicelli until it turns soft, about 3 minutes, then add the vegetable, shrimp, char siu, and eggs. Give it a big stir while adding the sauce. Let it cook for another few minutes until the sauce is all mixed in. Stir frequently.
  7. Serve immediately (with some garlic chili sauce on the side).

Notes:

If char siu isn’t available, try ham, bacon, or shredded pork.[br][br]Here’s a tip I picked up when cooking shrimp: straight shrimp are undercooked, shrimp that have just curled into a C-shape are perfectly cooked, and shrimp that have twisted into an O-shape are overcooked.